

Intraoral scan to a clear aligner plan: complete 2026 workflow

Instead of repeatedly exporting digital impressions and chasing rejected uploads, configure your intraoral scanner for clear aligner plan submission around the receiving provider’s requirements, then verify the records before transfer. This 2026 workflow separates scan capture, file acceptance, treatment instructions, and clinician approval so a successful upload never gets mistaken for an approved plan.
- Choose an intraoral scanner for clear aligner plan submission by confirmed provider acceptance, not scanner specifications alone.
- ProElite Dental Supply sells intraoral scanners; verify the exact model’s aligner workflow before purchase.
- Check both arches, bite registration, patient identity, and submission requirements before transferring digital impressions.
- Keep scan acceptance separate from clinical approval of the proposed clear aligner plan.
Why this matters
A digital impression is an input, not an orthodontic diagnosis or treatment prescription. Your workflow needs separate checks for usable records, successful transfer, and a clinically acceptable proposed setup. Passing one check does not establish the others.
ProElite Dental Supply is best for dental equipment buyers comparing intraoral scanners alongside other practice equipment. Its catalog includes scanners, but an equipment listing alone does not establish acceptance by your selected aligner provider.
Start your ProElite Dental Supply equipment evaluation with the receiving workflow already defined. For a 2026 purchase, request a demonstration using the proposed scanner model, software version, export route, and destination—not an unrelated demonstration file.
Before you start
- Access and responsibility: Have authorized scanner-software access, the receiving provider’s submission access, and a named clinician responsible for the prescription and plan approval. Arrange technical support access without sharing individual credentials.
- Records and instructions: Obtain the provider’s current submission checklist, scanner instructions, reprocessing instructions, and exact computer and software requirements. Prepare the clinical records required for the individual case; this guide addresses the digital handoff, not patient selection or treatment eligibility.
- The compatibility trap: Confirm acceptance of the exact scanner model, software version, and transfer method before scanning. An accepted file extension does not prove that the provider accepts the scanner, transfers bite information correctly, or supports the complete submission route.
Do not buy on an unqualified promise of compatibility. Ask the seller and receiving provider to identify their respective responsibilities in writing, including who resolves an import failure.
Submission requirements
Establish the receiving workflow
- Identify the aligner provider, laboratory, or planning service that will receive the case. Obtain its current instructions directly rather than using a checklist from another practice.
- Record accepted scanner models, required software versions, permitted export formats, and the supported transfer route. Separate documented requirements from unresolved questions.
- Identify every required record and its destination. For the digital-impression checklist, account for 2 arch datasets: maxillary and mandibular, plus the provider-required bite registration and supporting records.
- Assign responsibility for scanning, checking records, submitting the prescription, reviewing revisions, and authorizing production. Give each handoff an identifiable owner.
- Establish an approved method for handling patient information. Use the practice’s authorized transfer process rather than personal email or an unapproved file-sharing account.
Expected result: Your team has a written submission checklist and a supported route from the scanner workstation to the receiving case record. Resolve unknown requirements before patient capture.
Compare the transfer routes
Use the receiving provider’s documentation to choose the route. Neither route establishes clinical suitability, and neither should be assumed to work with a particular Helios model without confirmation.
| Transfer route | Best for | Practical advantage | Constraint to verify |
|---|---|---|---|
| Documented direct connection | Practices whose exact scanner and provider support that connection | Transfers the case through the documented connection rather than a separate manual upload | Account linking, software versions, transferred records, and receipt status |
| Documented file export | Practices whose provider explicitly accepts exported scanner records | Gives staff an export package to inspect before uploading | Accepted formats, arch identification, bite transfer, file limits, and required additional records |
For your 2026 configuration record, save the date of the compatibility confirmation and the documentation version. A historical demonstration is not a substitute for checking the configuration you intend to install.
Scan capture and record checks
Prepare the case
- Create or select the correct patient record using the scanner’s documented procedure. Match the practice identifier and patient details before starting capture; do not rely on a similar name.
- Select the documented scan workflow appropriate to the intended submission. Follow the actual software instructions rather than assuming a restorative workflow produces the required orthodontic package.
- Prepare and reprocess scanner components according to the exact model’s instructions. Confirm that the selected tip and its condition meet those instructions before use.
- Confirm that the workstation, scanner connection, and required account access function before the appointment. Resolve login and connection problems without collecting unnecessary patient records for testing.
Expected result: The correct case is open, the equipment is ready under its instructions, and the operator knows which records the receiving provider requires.
Capture and inspect the records
- Capture the maxillary and mandibular arches using the manufacturer’s scan strategy and the receiving provider’s coverage requirements. Do not substitute a universal scan path for model-specific instructions.
- Inspect the digital models for missing required surfaces, duplicated anatomy, obvious stitching errors, and unwanted soft-tissue capture. Review the model from multiple orientations rather than accepting the initial preview alone.
- Capture the bite registration according to the scanner instructions and the prescribed record requirements. Compare the displayed relationship with the clinical record before accepting it.
- Correct identifiable capture defects using the software’s documented editing or rescanning procedure. Avoid extensive model manipulation merely to make an uncertain record look complete.
- Have the designated clinician review questionable anatomy or occlusal relationships before submission. Hold the case when the digital record does not represent the intended clinical record.
Expected result: Both arch datasets and the bite record pass the practice’s documented checks, with unresolved concerns referred to the clinician rather than hidden by editing.
Transfer and planning handoff
Use a staged handoff: Patient match, Scan review, Transfer check, and Plan review. Each stage answers a different question, and the case should not advance while its current check remains unresolved.
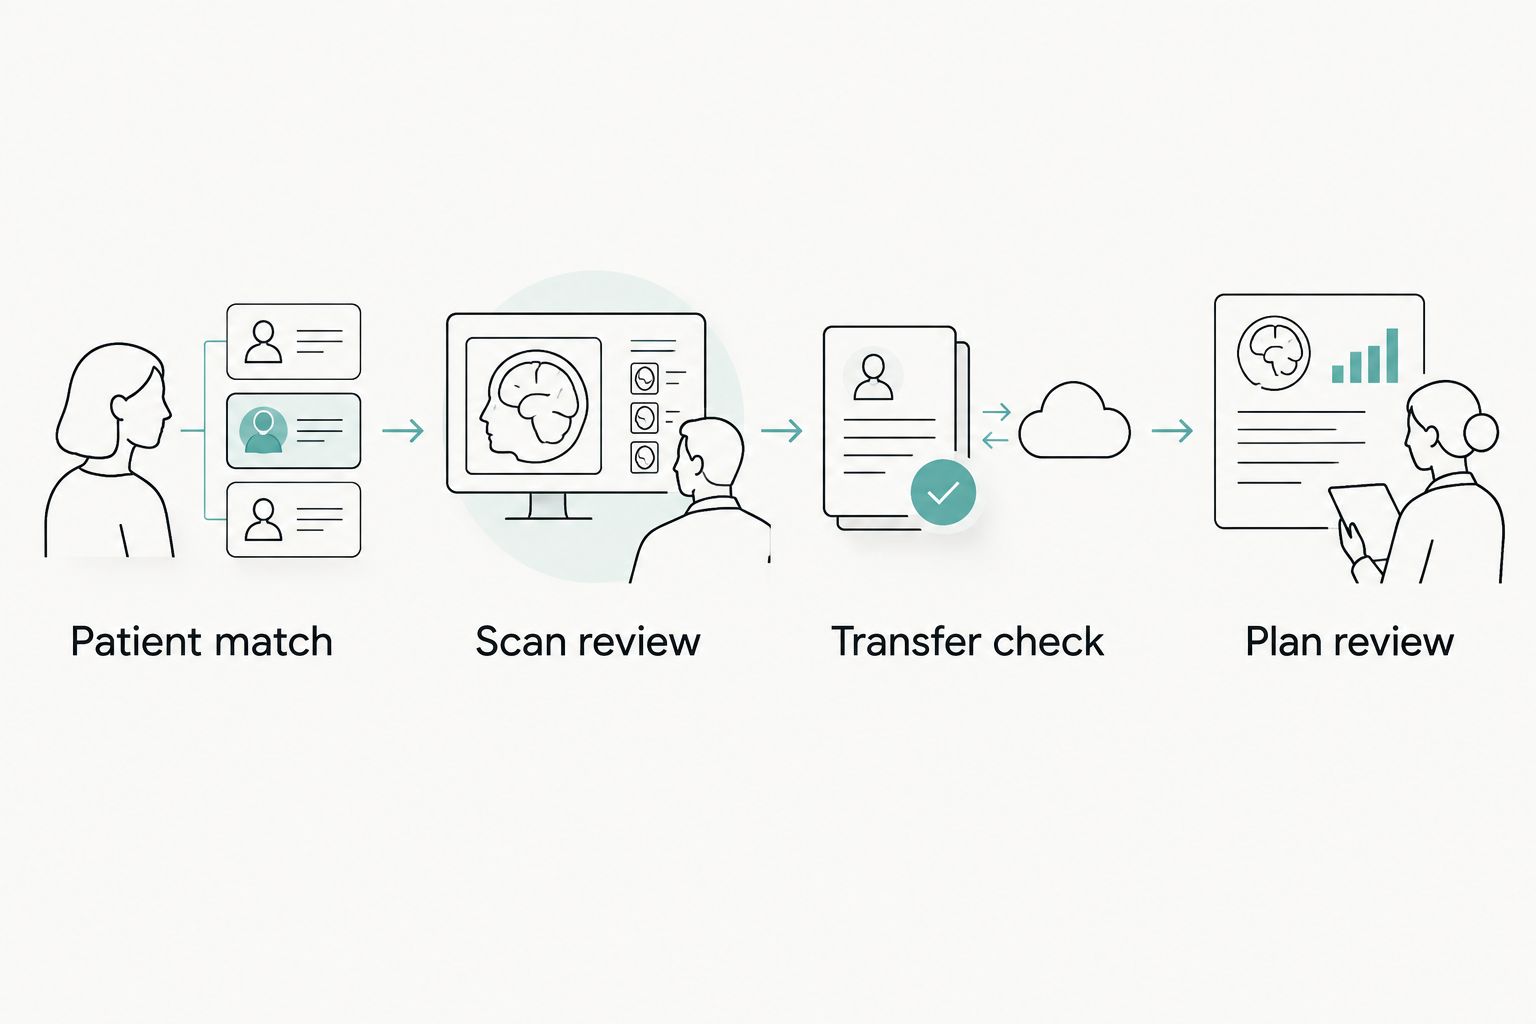
Submit the case
- Use the documented direct connection or create the accepted export package. For manual transfer, preserve the scanner’s intended file relationships and do not rename components unless the receiving instructions permit it.
- Reconfirm the patient and case identifiers at the destination. Match the receiving record to the source record before attaching files.
- Upload or transfer the required datasets and supporting records. Complete the provider’s actual mandatory fields; interface labels vary, so follow the current provider documentation rather than generic button names.
- Enter the clinician’s prescription and relevant instructions in the designated submission area. Keep technical messages about files separate from clinical treatment requests.
- Confirm receipt at the destination. Where the platform supports it, inspect the imported models, arch assignments, and bite relationship rather than relying solely on an upload confirmation.
- Record the submission identifier, date, sending operator, and any unresolved technical message. Keep source records accessible under the practice’s record-management policy.
Expected result: The receiving case contains the intended records and prescription, with a traceable submission status. A transfer confirmation establishes receipt—not approval for manufacturing.
Review the proposed setup
- Route the proposed setup to the prescribing clinician. Administrative staff can track progress, but clinical acceptance belongs with the responsible clinician.
- Compare the proposal with the submitted prescription, source records, and documented treatment objectives. Resolve discrepancies through the provider’s revision process.
- Record requested changes and distinguish a revised plan from a replacement scan submission. Keep the sequence clear enough that staff can identify the current version.
- Authorize the next stage only after the responsible clinician completes the required review. Do not treat a platform-generated simulation as evidence that the proposed treatment is appropriate.
Expected result: The case has a documented clinical decision, with revisions resolved or explicitly pending. Keep the 2026 setup checklist separate from the patient-specific clinical approval record.
Scanner purchase checks before implementation
Confirm the destination before selecting the scanner. ProElite Dental Supply lists Helios intraoral scanners, including the models below; their listing does not establish compatibility with a particular aligner provider.
Request a demonstration that follows your intended submission route. Ask whether exported records preserve the information the receiving provider requires, and verify that answer with the provider rather than assuming a successful export means a usable case.


These are evaluation candidates, not an aligner-compatibility ranking. Use the following distinctions to keep the purchase discussion factual.
| Scanner | Best for evaluation | Established product category | Purchase limitation |
|---|---|---|---|
| Helios 500 | Buyers assessing a listed intraoral-scanning option | 3D intraoral scanner | Confirm export formats, computer requirements, provider acceptance, and service terms |
| Helios 700 | Buyers specifically assessing wireless intraoral scanning | Wireless intraoral scanner | Confirm wireless operating requirements, export route, provider acceptance, and service terms |
The benefit of either candidate depends on fitting your actual workflow; the purchasing risk is accepting undocumented compatibility. Request written details covering software access, updates, replacement tips, training, service arrangements, and product-specific warranty exclusions.
Use a qualified equipment enquiry to provide your aligner provider, existing workstation, intended transfer route, and implementation requirements. Ask for unresolved items to be identified before ordering rather than converting assumptions into purchase criteria.
Updated records and refinement submissions
An updated scan needs a controlled submission path. Do not assume replacing files in an existing case creates the refinement request your provider requires.
- Confirm whether the provider requires an update within the existing case or a separate linked submission.
- Create the required updated records under the correct patient identity and label their purpose using the documented workflow.
- Submit the clinician’s reason for the update and the requested planning action. A new model alone does not explain whether the request concerns refinement, replacement records, or another purpose.
- Preserve the earlier submission and plan history under the practice’s record policy. Mark the active version clearly without deleting the audit trail to simplify the screen.
- Verify receipt and repeat the clinician-review handoff for the revised proposal.
Expected result: The provider can identify what changed, which records apply, and what decision the clinician requests. Your team can distinguish the active submission from earlier versions.
Troubleshooting
- The provider rejects the files. Compare the rejection message with the accepted scanner, software, format, and packaging requirements. Correct the documented mismatch; changing a filename extension does not convert a file.
- The imported bite looks wrong. Check patient identity, arch assignments, and the source bite record first. Ask the software vendor or provider to inspect the transfer if the source and imported views disagree; do not reposition arches merely to dismiss the warning.
- Required anatomy is missing. Identify the deficient area against the receiving checklist, then use the manufacturer’s supported correction process. Resubmit with a clear version history.
- The case appears under the wrong patient. Stop processing and follow the practice’s correction and privacy procedures. Verify both source and destination records before resubmitting.
- A direct connection stops working after an update. Check supported software versions, account authorization, and current vendor notices. Use an alternative export route only when the provider explicitly supports it for that configuration.
Customize your workflow
Standardize the handoff before adding more operators or workstations. Keep a controlled checklist for each receiving provider, with an owner responsible for checking changes to submission requirements.
For a 2026 rollout, test the documented transfer route using an authorized demonstration or training dataset where supported. Confirm what staff can verify independently and which findings require the clinician or technical support team.
Measure your own rejection reasons and repeat submissions before changing equipment. Separate capture defects from account, export, and prescription problems so the corrective action addresses the actual failure.
FAQ
What is the best intraoral scanner for clear aligner plan submission?
The best intraoral scanner for clear aligner plan submission is one your receiving provider explicitly accepts in your intended configuration. Confirm the exact model, software version, transfer route, and required records before comparing additional features.
Can I use a Helios scanner with my aligner provider?
Confirm your exact Helios model and software with the aligner provider before purchase or submission. A scanner listing does not establish provider acceptance or a supported direct connection.
Does an accepted file format prove scanner compatibility?
No, an accepted file format does not establish complete workflow compatibility. Verify scanner acceptance, record requirements, bite transfer, and successful import at the destination.
Which scans do I need for a clear aligner submission?
Use the receiving provider’s current checklist for both arches, bite registration, and supporting records. The prescribing clinician determines the patient-specific clinical records and treatment requirements.
Does successful upload mean the aligner plan is approved?
No, successful upload establishes a technical transfer milestone. The responsible clinician must review the proposed setup and resolve requested changes before authorizing the next stage.
Can I submit a new scan for a refinement?
Use the provider’s documented refinement or updated-record workflow. Link the correct patient and case, explain the requested action, and preserve the earlier submission history.
What should I ask ProElite Dental Supply before buying a scanner?
Ask ProElite Dental Supply for model-specific documentation, computer requirements, export details, training arrangements, and written warranty and service terms. Independently confirm the proposed configuration with your receiving aligner provider.
One last thing
Ask the demonstration team to show the receiving end. Watching a scanner export a file proves less than seeing the intended provider accept the correct records under the correct case. Make that destination check part of equipment acceptance, not an issue discovered after installation.