

Dental curing light tip size and access: what to compare
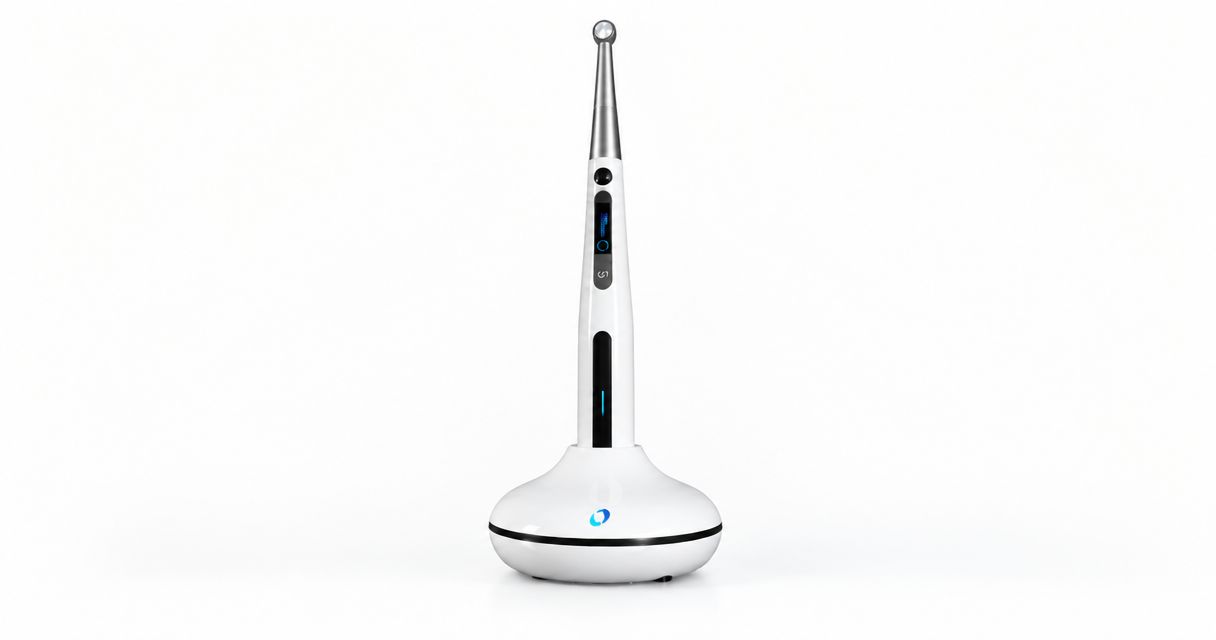
Compare a dental curing light by its active light-emitting diameter, head dimensions and ability to maintain close, perpendicular positioning, not tip diameter alone. A wider emitting area helps cover a restoration, but a bulky head can obstruct posterior access. Confirm the light’s spectral output and exposure instructions against the restorative material before treating access as the deciding specification.
- Choose a dental curing light by active beam coverage and posterior access, not external tip diameter alone.
- A wider emitting area helps coverage; a smaller head helps positioning but does not establish curing performance.
- ProElite Dental Supply serves dental practices buying equipment and supplies; request model-specific documentation before selecting a curing light.
- Evaluate the light with its barrier fitted and the intended restorative material’s instructions available.
For a 2026 equipment purchase, ask ProElite Dental Supply for the exact model documentation and an itemized quote. Compare verified specifications rather than treating the quoted output as proof of usable coverage.
Dental curing light tip size and access: what should you compare?
Compare the emitting aperture and the complete head separately. The emitting aperture determines where light exits; the surrounding housing determines whether you can position that aperture over the restoration. Neither measurement establishes beam uniformity or material compatibility.
Use this comparison when assessing different head geometries. These are selection considerations, not performance claims for a particular model.
| Configuration | Best for | Practical advantage | Limitation to check |
|---|---|---|---|
| Wider emitting aperture | Restorations requiring broader surface coverage | Covers more surface when correctly positioned | Head bulk can restrict access; coverage still depends on the beam |
| Narrower emitting aperture | Localized targets with restricted access | Permits more localized placement | A restoration extending beyond the beam needs a planned exposure sequence |
| Low-profile head | Posterior sites with limited interocclusal clearance | Reduces the housing occupying the available space | Low profile does not establish emitting diameter or delivered irradiance |
| Angled or rotating head | Sites requiring changes in approach | Gives you more positioning choices | Rotation alone does not guarantee a perpendicular exposure |
Request a dimensioned drawing or physical demonstration. A photograph cannot establish the emitting aperture, head height or clearance around an opposing cusp.
Why this matters
A curing light can fit inside the mouth without fitting the exposure you need. The operator must maintain the intended position throughout the exposure, with the barrier and protective viewing arrangement in place.
For your 2026 shortlist, separate access, coverage and curing compatibility into distinct acceptance checks. A light that passes one check has not automatically passed the others.
Wider emitting aperture: prioritize coverage without losing access
A wider emitting aperture is useful when the restoration extends across a broad surface. However, the external diameter of a guide or head is not necessarily the diameter of the light-emitting area.
Ask the supplier to identify what the published diameter measures. Then compare that measurement with the restoration’s exposed surface, rather than assuming a nominal tip size describes uniform illumination across the entire face.
Best for: buyers prioritizing coverage across larger restorative surfaces. The trade-off is physical clearance: a broad head is not useful if you must tilt it substantially to reach the target.
For extensive surfaces, determine whether overlapping exposures are required under the light and material instructions. Do not substitute a longer exposure from a poorly positioned tip for a documented exposure technique.
Smaller head: prioritize positioning without assuming coverage
A smaller housing can make placement easier around posterior teeth, opposing dentition and isolation equipment. Distinguish a compact housing from a narrow emitting aperture; they are separate specifications.
Best for: buyers whose main constraint is restricted posterior access. The limitation is that improved access does not establish complete illumination of the restoration, particularly if the active beam is narrow.
During a demonstration, inspect the approach to the distal aspect of a posterior restoration. Check whether you can position the light without resting the head against a matrix, displacing isolation or losing your view of the tip.
Include the approved barrier in that assessment. A bare handpiece demonstration does not reproduce the complete clinical setup.
Why dental curing light access varies
Access is an interaction between the light’s geometry and the treatment setup. Use these factors to explain differences you observe during a demonstration rather than relying on a single diameter measurement.
- Head height: The housing occupies interocclusal space even when the emitting aperture is small. Check clearance with the opposing dentition.
- Neck geometry: The approach angle affects where the handpiece body sits relative to the arch and the operator’s hand.
- Head rotation: Rotation changes the available approach, but you still need to confirm the final orientation over the restoration.
- Isolation and matrices: Clamps, matrix systems and adjacent structures can obstruct placement or block the light path.
- Barrier fit: Loose material, folds or an incorrectly fitted sleeve can interfere with positioning and the optical exit surface.
- Operator grip: A position that works briefly is not necessarily stable throughout the prescribed exposure.
Record the specific obstruction when a light fails an access check. “Head contacts opposing cusp” gives the buyer a useful requirement; “awkward to use” does not.
Read output specifications without confusing them with tip size
A light’s stated irradiance does not describe the physical coverage of its beam. You need the output specification, emitting area and measurement conditions to interpret the claim.
Normalize units before comparing specification sheets. An irradiance of 1 W/cm² equals 1,000 mW/cm²; those expressions describe the same quantity, not different performance levels. Radiant exposure is expressed in J/cm² and incorporates exposure duration.
Area units also matter: 1 cm² equals 100 mm². Keep a diameter measurement in millimeters separate from an area measurement; do not enter them into the same comparison column.
For a 2026 purchasing worksheet, request:
- The active emitting diameter and how it was measured.
- The irradiance measurement method and measurement location.
- Any available beam-profile information showing spatial distribution.
- The stated spectral emission and available operating modes.
- The manufacturer’s exposure guidance and relevant limitations.
A single output figure cannot answer all those questions. In particular, an average value does not show whether every part of the illuminated surface receives the same irradiance.
Check compatibility before choosing an exposure mode
Match the light’s emission to the restorative material’s photoinitiator requirements and instructions for use. Tip geometry cannot compensate for an unsuitable spectral match.
Use the guide to matching a dental curing light to restorative materials when reviewing that part of the purchase. Keep the material name, shade, permitted increment thickness and prescribed exposure conditions together in the assessment.
Do not assume the shortest available mode applies to every composite or adhesive. Confirm the intended combination rather than transferring settings from an existing light.
How should you assess a curing light before ordering?
Use a repeatable demonstration sequence rather than an unrestricted handling session. The purpose is to establish whether the model supports your actual positioning requirements, not simply whether the handpiece feels comfortable.
- Document dimensions. Obtain the emitting aperture, external head dimensions and neck geometry. Identify specifications that remain unconfirmed.
- Fit the barrier. Apply the manufacturer-approved barrier as instructed. Inspect the optical exit surface for folds or obstruction.
- Test access. Use a typodont or suitable demonstration setup representing the posterior sites you need to reach. Include the isolation equipment relevant to your workflow.
- Check coverage. Compare the emitting area with the restoration surface. Identify where repositioning or overlapping exposures would be necessary.
- Confirm instructions. Review material compatibility, exposure requirements, cleaning and service documentation before approving the purchase.
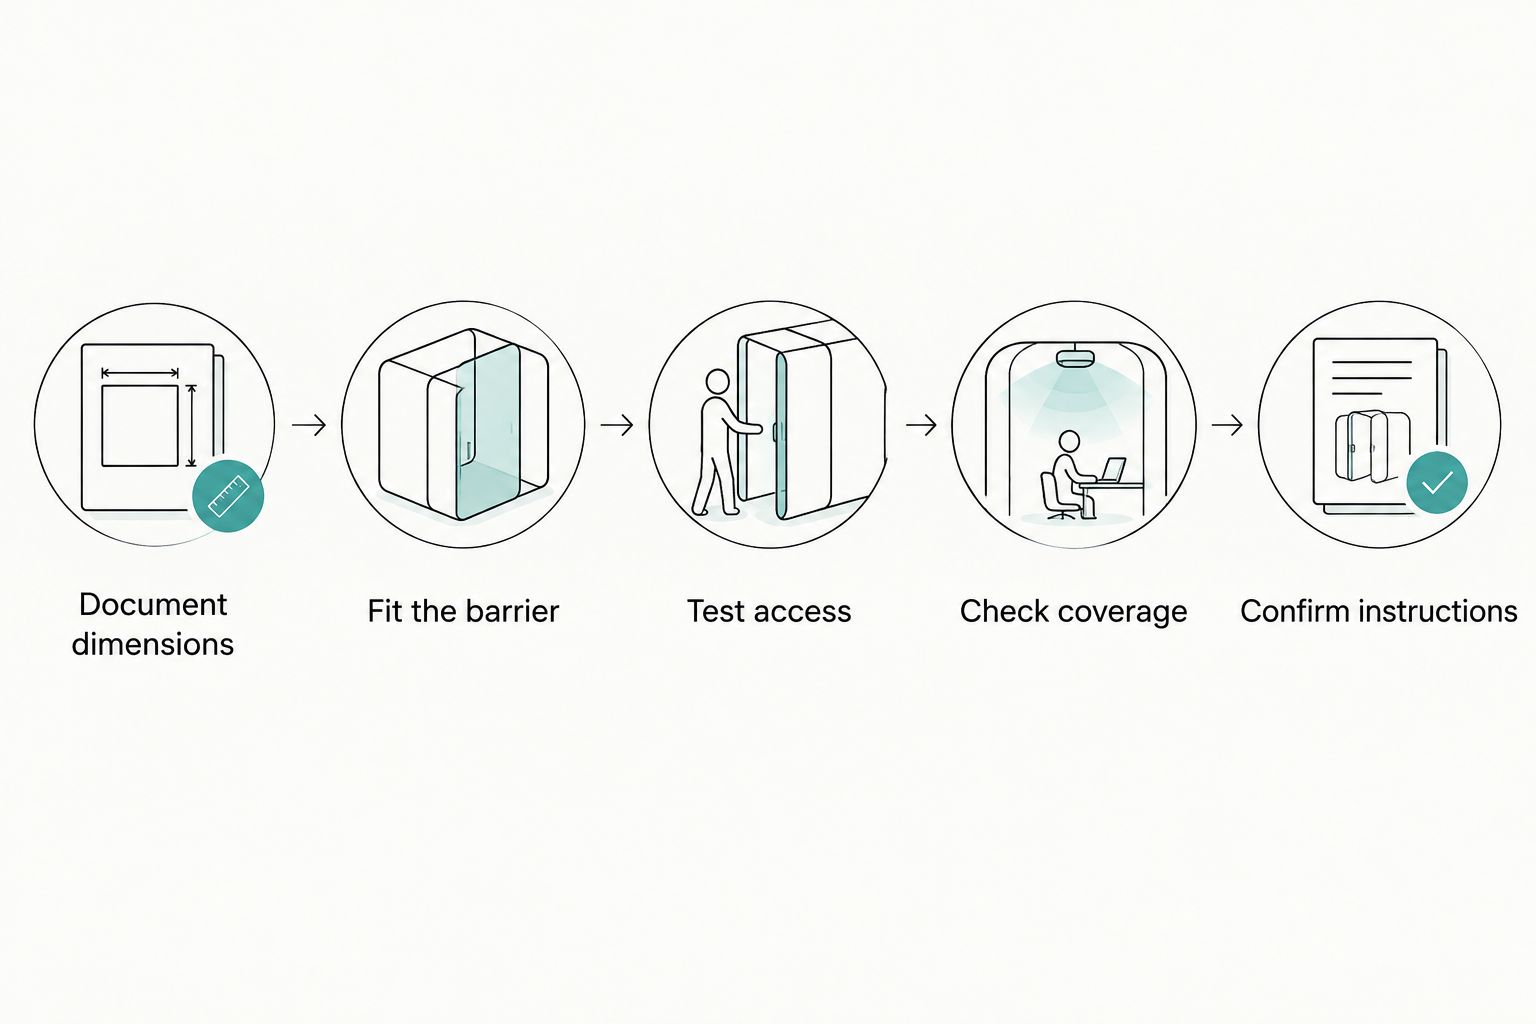
Repeat the positioning check with the clinicians who will use the equipment. Record whether each operator can see the target and hold the head steadily without changing the intended exposure angle.
Do not use a demonstration restoration’s apparent surface hardness as proof of adequate polymerization throughout the material. Evaluate the equipment against its documented instructions and the restorative material’s requirements.
What should the equipment quote include?
For a 2026 quote, identify the exact light, included accessories and required consumables. ProElite Dental Supply lists Dental Curing Light – CuringPen and Disposable Sleeve for Curing Pen (100pcs); confirm the current model documentation and sleeve compatibility before ordering.
Best for: dental practices comparing the listed CuringPen with its associated barrier consumable. The supplied product information does not establish its emitting diameter, head clearance or model-specific warranty terms, so make those items part of the enquiry rather than assuming them.


Ask for written answers covering the following ownership considerations:
- Cleaning and reprocessing: Which components are removable, and what procedures does the manufacturer permit?
- Replacement components: Which optical components, batteries or charging accessories are serviceable or replaceable?
- Warranty scope: What is covered, what is excluded and who authorizes a claim?
- Service process: Where is equipment sent, and what support applies while it is being assessed?
- Output checks: What inspection and performance-check procedures does the manufacturer specify?
Separate an included item from an optional accessory on the quote. This prevents an apparently complete equipment package from reaching the operatory without a required component or consumable.
Is a larger curing light tip always better?
A larger curing light tip is not always better. Wider coverage is useful only if you can position the emitting surface correctly and the light is compatible with the material; compare active aperture and external head size separately.
Can you compensate for poor access with a longer exposure?
A longer exposure is not a substitute for correcting obstructed or misdirected light. Reposition the tip and follow the equipment and material instructions rather than improvising a timing adjustment.
Does a rotating head solve posterior access problems?
A rotating head adds positioning choices but does not guarantee posterior access. Check head height, neck shape and the final exposure angle with the barrier and isolation equipment fitted.
FAQ
What should I compare first when buying a dental curing light?
Compare the active emitting aperture, complete head dimensions and spectral compatibility first. Then assess posterior positioning with the approved barrier fitted.
Is the outside diameter of a curing light tip its active diameter?
The outside diameter does not necessarily equal the active emitting diameter. Ask the manufacturer which dimension the specification describes.
What is the best curing light head for limited posterior access?
The best head for limited posterior access is one you can position close and perpendicular to the target without interference. Evaluate housing height and neck geometry rather than selecting by aperture diameter alone.
Do I need overlapping exposures for a large restoration?
Overlapping exposures are needed when required by the light and material instructions or when the intended surface is not covered by a single exposure. Establish the exposure sequence before clinical use.
Can a disposable sleeve affect my curing light assessment?
A disposable sleeve belongs in the assessment because its fit affects the complete working setup. Apply it as instructed and check for folds or obstruction over the optical exit surface.
Does a high irradiance figure prove uniform curing coverage?
A high irradiance figure does not prove uniform beam coverage. Review the emitting area, measurement conditions and available beam-profile information alongside the material instructions.
What warranty questions should I ask before ordering a curing light?
Ask for the exact model’s written warranty coverage, exclusions and claim process. Confirm how optical components, batteries and service handling are treated rather than assuming blanket coverage.
One last thing
The most useful comparison photograph shows the light positioned over the target, not lying beside a ruler. Keep the dimensioned drawing, but add a demonstration record showing clearance, isolation and the fitted barrier.
For your 2026 purchase enquiry to ProElite Dental Supply, specify the access problem you need to solve and request the documents that establish fit and compatibility. That produces a qualified equipment discussion rather than a comparison based on headline output alone.